Flexy's Buk.It.
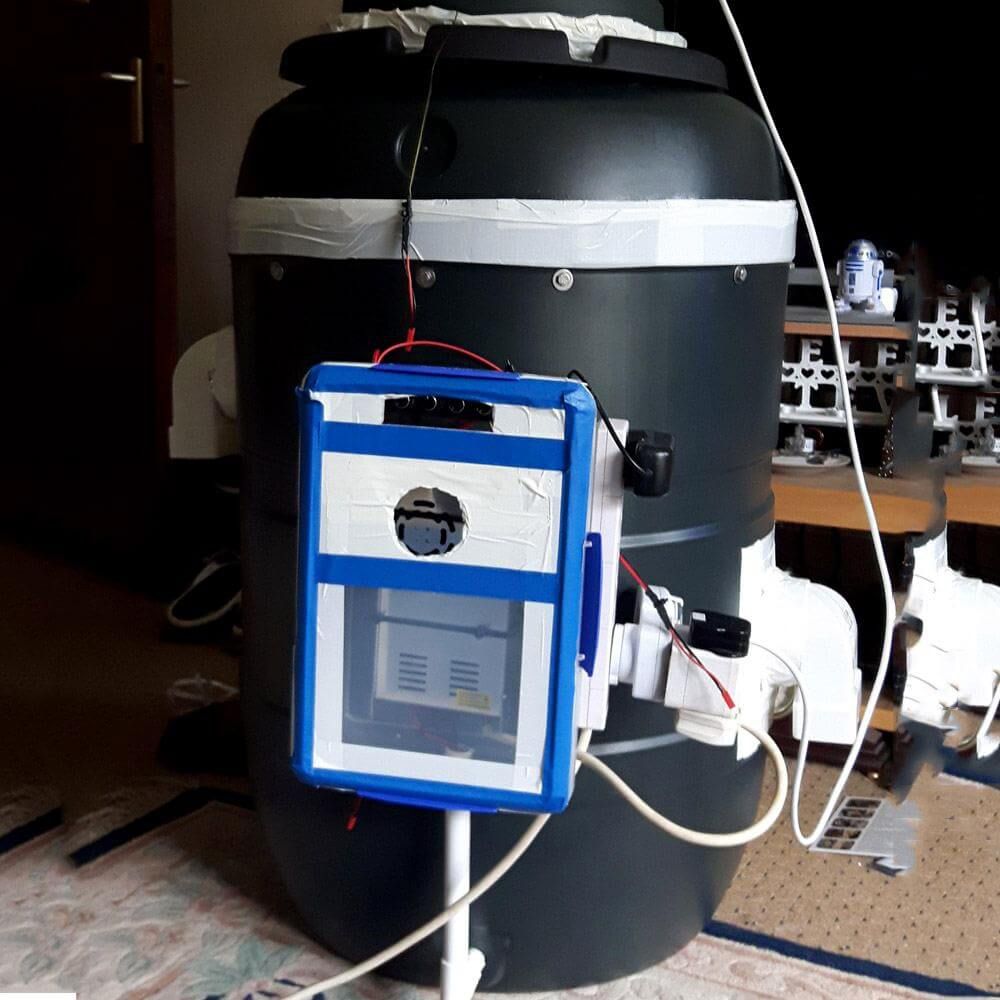
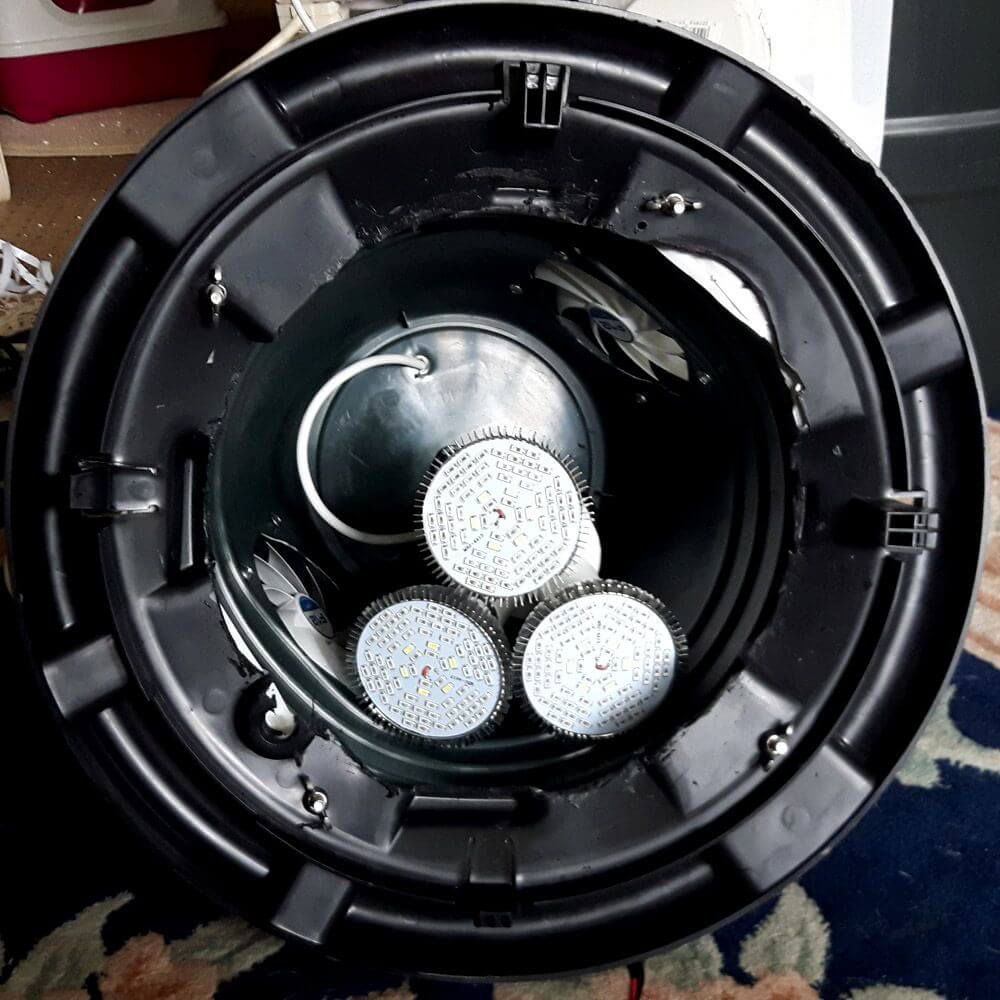
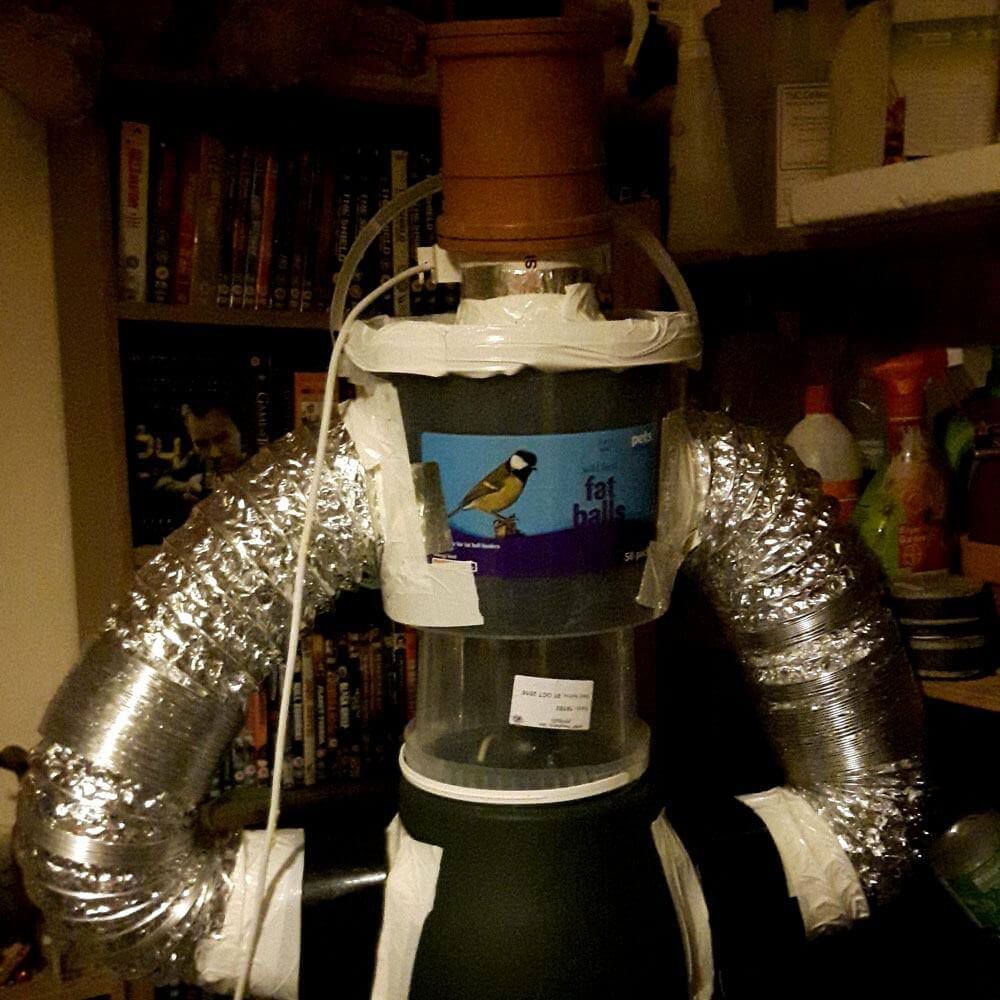
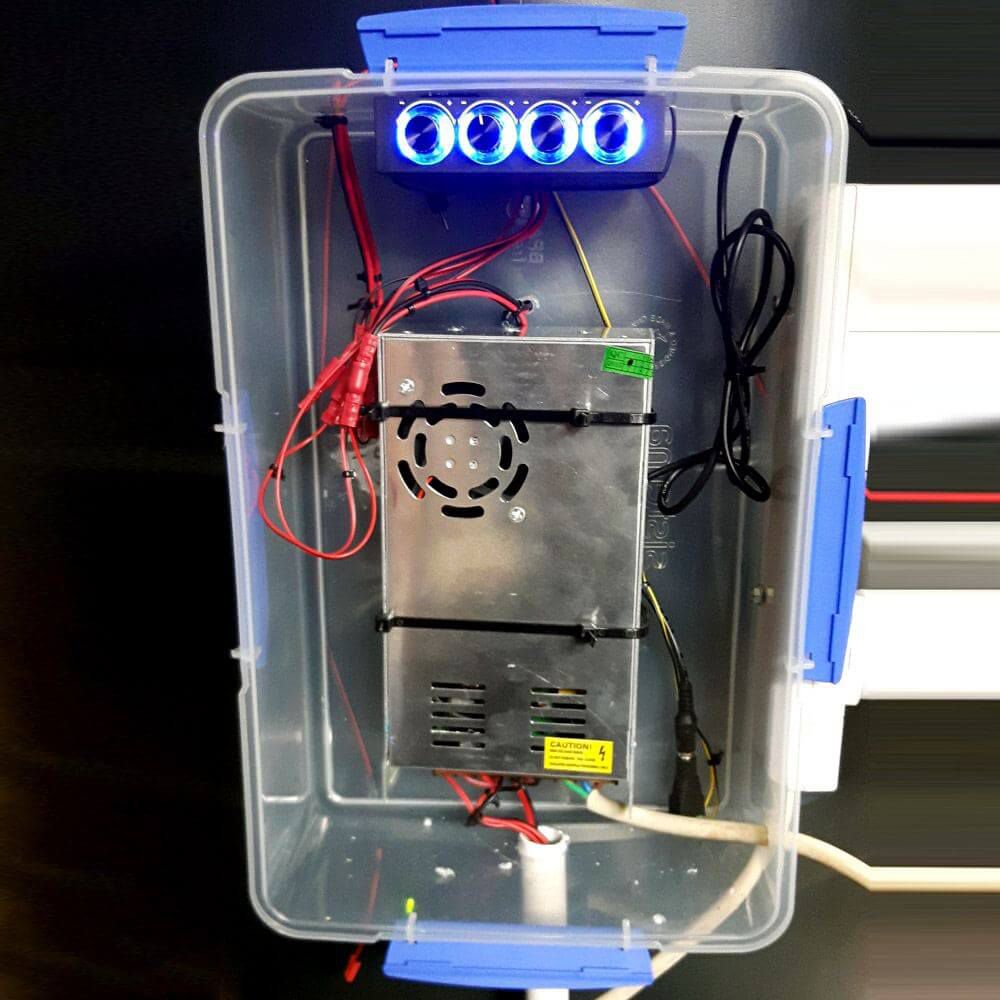
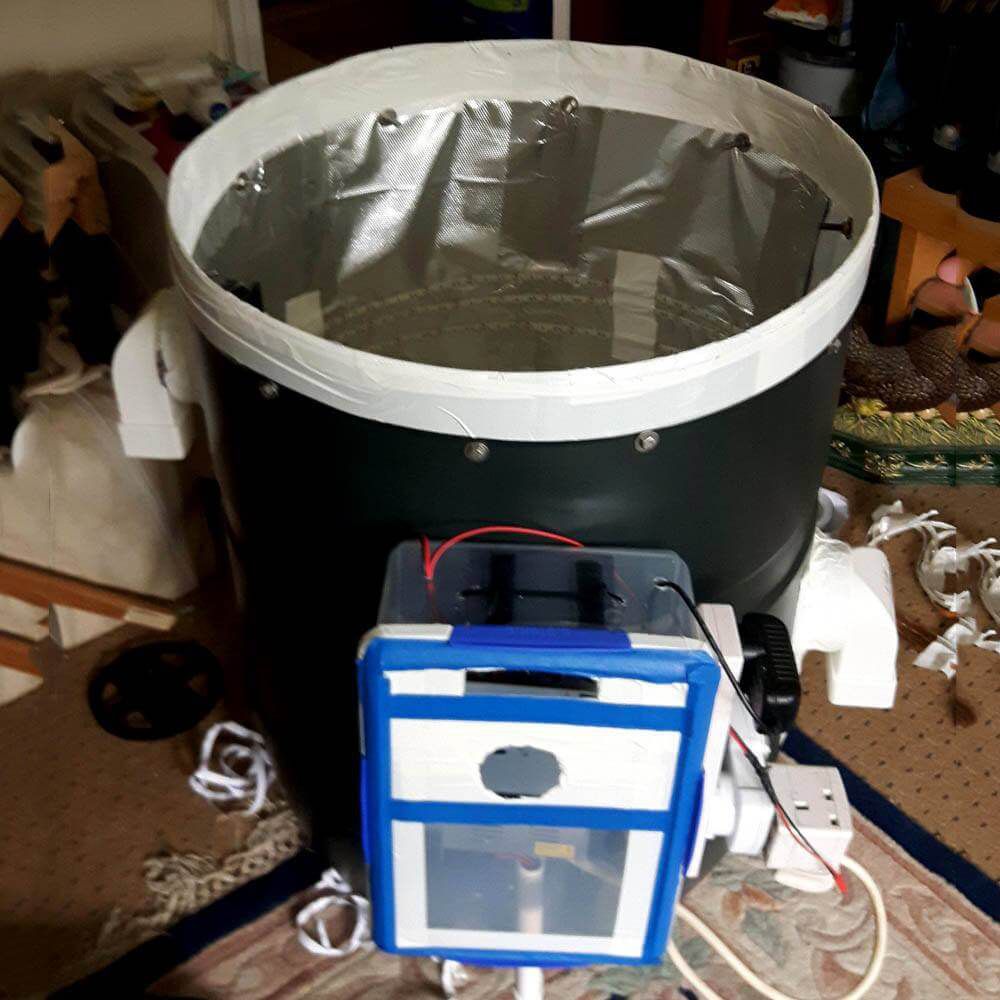
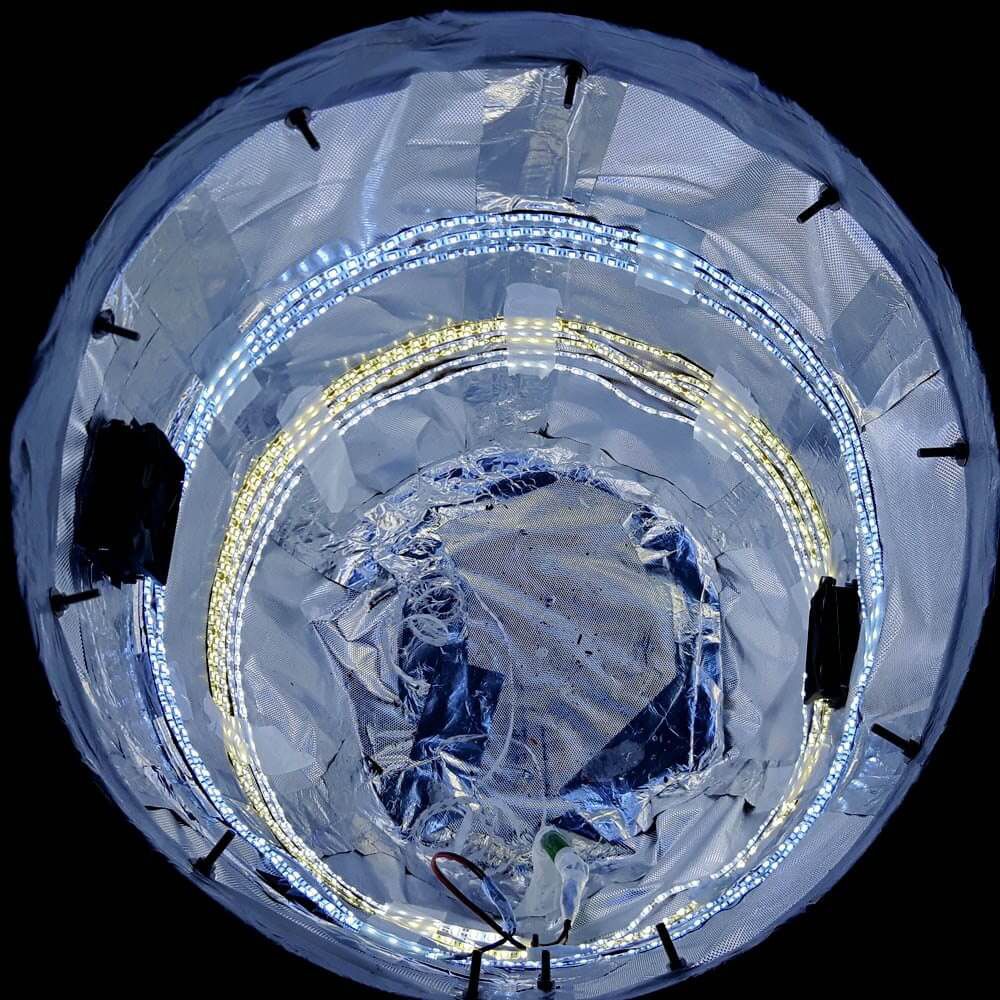
I've loitered for a while and after a minor electrical fire in my cabinet I decided space buckets we're the way to go. With so many different examples I was actually quite excited to start. This is my first bucket it's not the cheap option, but I liked what I have done.I have to start a 210 litre water butt sliced around the top to ease access when needed. I chose this size to allow my plants so good spreading space and leave me some room for lst. The main lights are 3x50 Watt, I bought 9 of these for my cabinet, never got around to using them (see above) It was a no brainer to use them they also include 6 UV and 6 IR leds per bulb. The originally hung from the lid and the exhaust fans we're built into the lid also, I then realised with them hanging I had minimal grow room, so I added the 'hat' which gave me an extra 18inches. The light pendant is on a yo-yo lead so I can lower the he light with minimal effort.I have 3x 5m lengths of side lights 1x warm, 1x cool and 1x pure white. This was not the plan, but I ordered a replacement strip as a pure white thinking it was the same, which it isn't and next bucket I build will have pure white instead as they appear to be a lot better. Unsure of the wavelength though. All leds are wired into a single transformer I wanted a clean look without wire hanging everywhere.I coated the inside with diamond Mylar and foil tape. This stuff has some good read ups however it's a pig to stick the leds to, hence the white tape that is holding them up also.Fans are 2x 92mm inlet and 2x 120mm exhaust, each has it's own speed control. The exhaust fans are easily unplugged which on some days I have to as they are too powerful really and suck the humidity out. I bought the fans without doing the math first. I staggered the inlet fans to hopefully create some kind of circulation inside the bucket. All electrics run off a single 4 gang lead which is surge protected also for a clean and tidy look.I am currently making a filter to attach to the exhaust fans directly, with a bathroom extractor fan to help. Just waiting on more carbon to be delivered. Also an irrigation pipe will also be built in at some point. Pictures of these will follow.I've now added the filter, it has all but eliminated any odour present, no more waking up with the munchies.The top pot has around 2kg of large activated charcoal chunks and a sweet jar drilled with inch holes and covered with a stocking. An extractor fan is taped to this to pull the air through the charcoal. The ducting just slips over the exhaust fans of the bucket which I have turned up to around half speed. The humidity and temperature have hardly changed but can all be tuned via the speed controllers. The filter can easily be disconnected and moved for internal work or there is enough ducting to move the filter, to the floor or shelf.THINGS I'VE LEARNT Diamond Mylar is great, but things don't stick to it so next time I'll use cable ties to fix the led strips to the inside. I would also wire these properly outside and then route them inside, as I had a slight burn out on one strip where I just twisted the wires together although all the joints were taped and insulated Aluminium tape is great. The most annoying thing I've learnt is to do with the 12v transformer. It's a 30amp model (running 3x 5m lcompensate and 4 fans) and has a cooling fan. These apparently don't like standing up as it affects the fan which makes them very noisy and now after laying it down the fan just grinds away, I'll be replacing this at some point and rejigging the side box to compensate. I've used too much fan really even at the lowest speed I have low humidity levels and have to unplug one exhaust fan and add a humidifier during veg, this fires in through the highest intake fan from outside so no real issues. Fleabay special, 3litre humidifier shipped from China cost less than £5, lasts all day, easy fix... However lowering the humidity is a piece of cake. Next project will be totes I think.