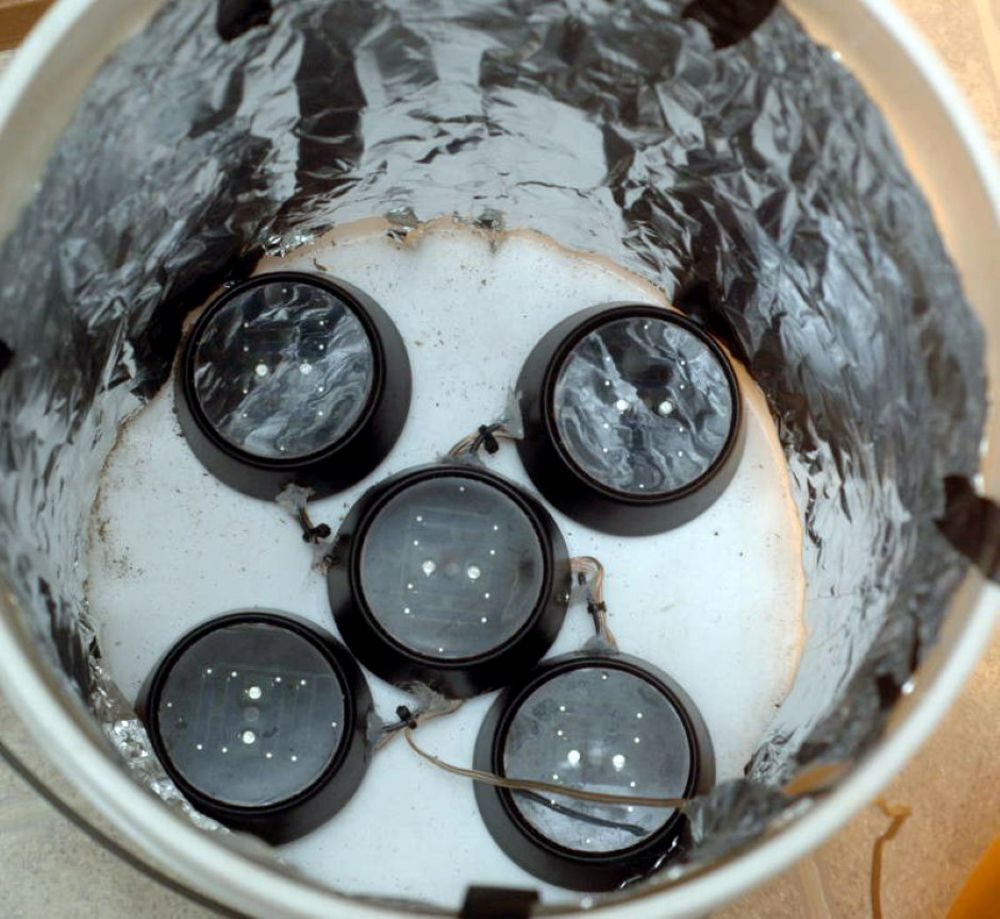
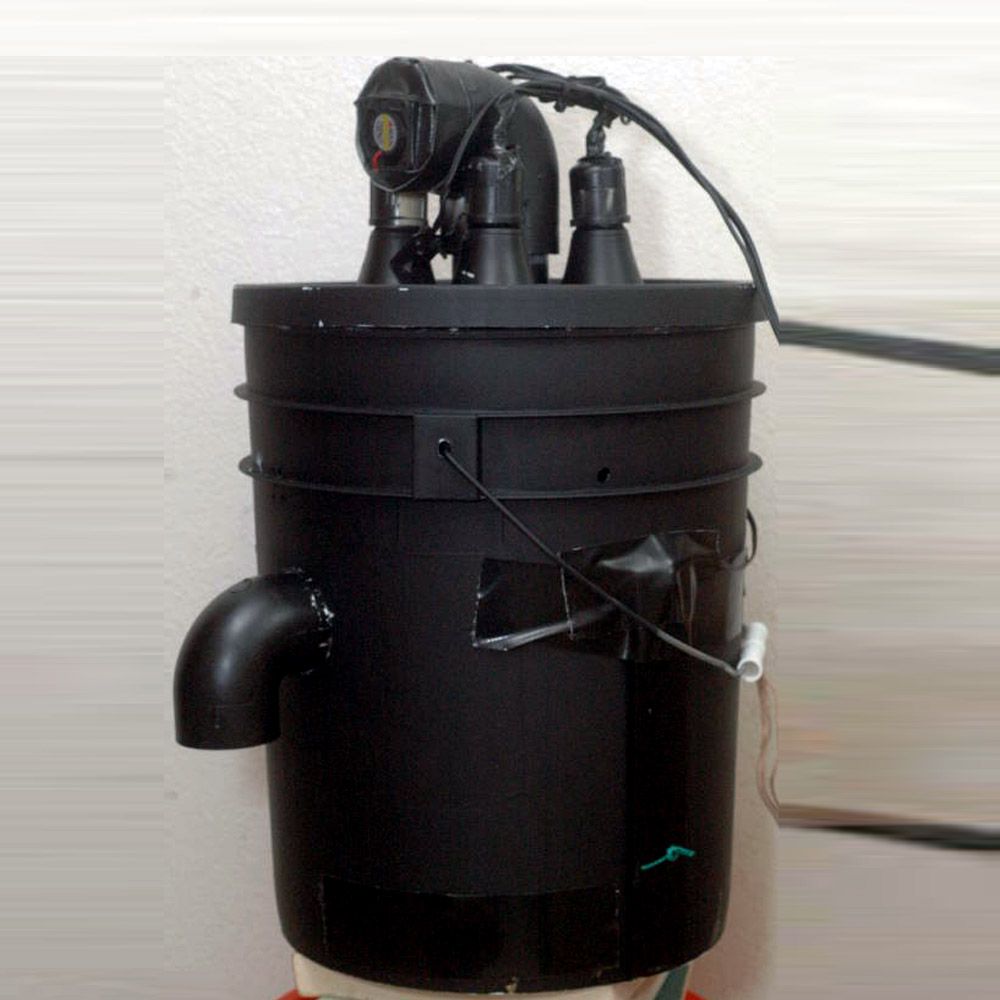
Here's my first try with the Ekrof Space Bucket. His build features 56 watts LEDs including power supplies (49 watts on the warm white LEDs). Seven 8 watt lights/modules: 4 on top, 3 on the side. Cost was about subsidized by the local power company. Side and intracanopy lighting is about increasing the effective leaf area index (the amount of leaves receiving direct light). Lights held in place by 5 minute epoxy. There is a single 40mm fan, temps never go above 3 degrees F above ambient. (1.5 degrees typical). In testing flat white paint, unpainted white bucket, Panda Plastic white sheeting, Mylar and aluminum foil, Mylar and the foil came out on top with a virtual tie.
LIGHTING INNOVATION
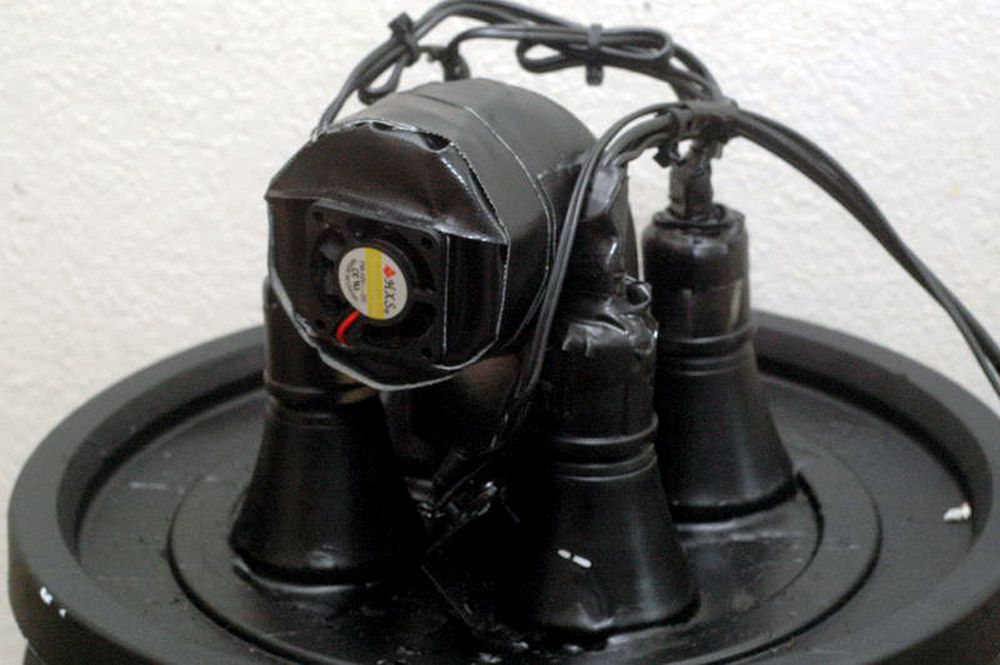
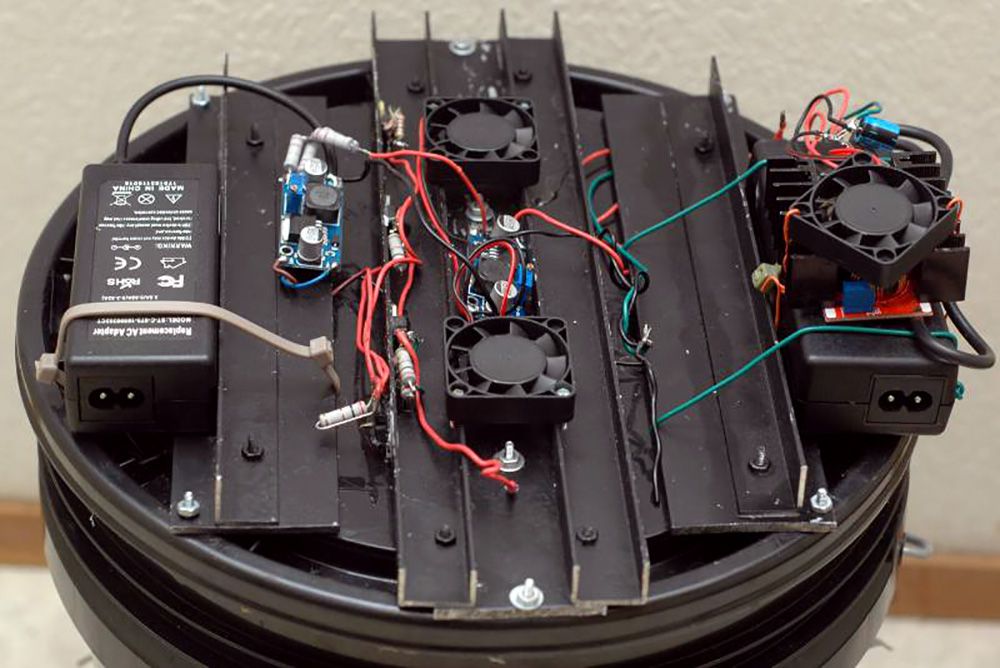
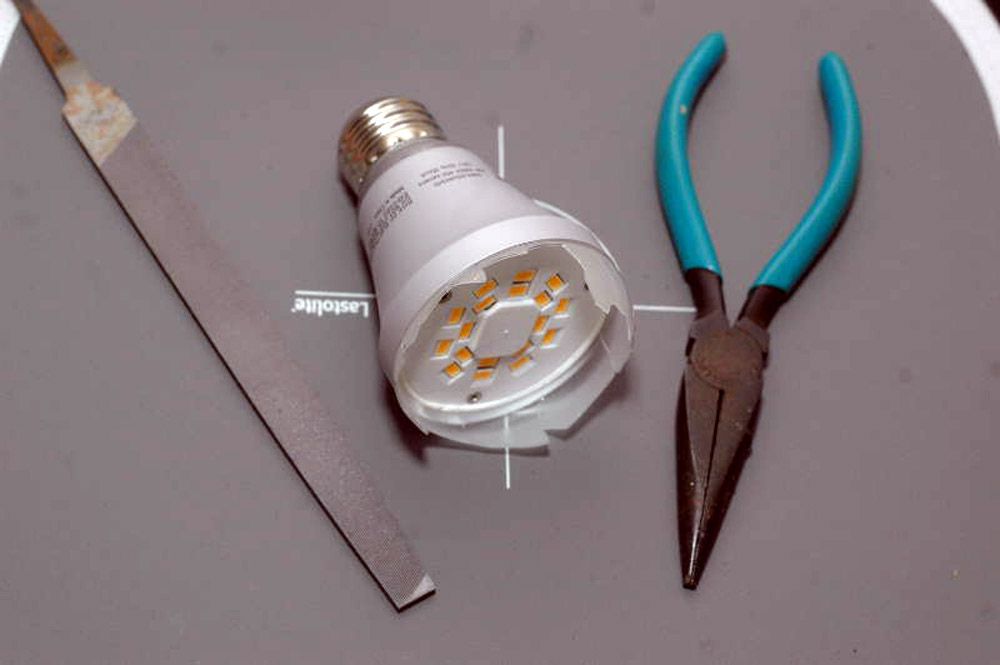
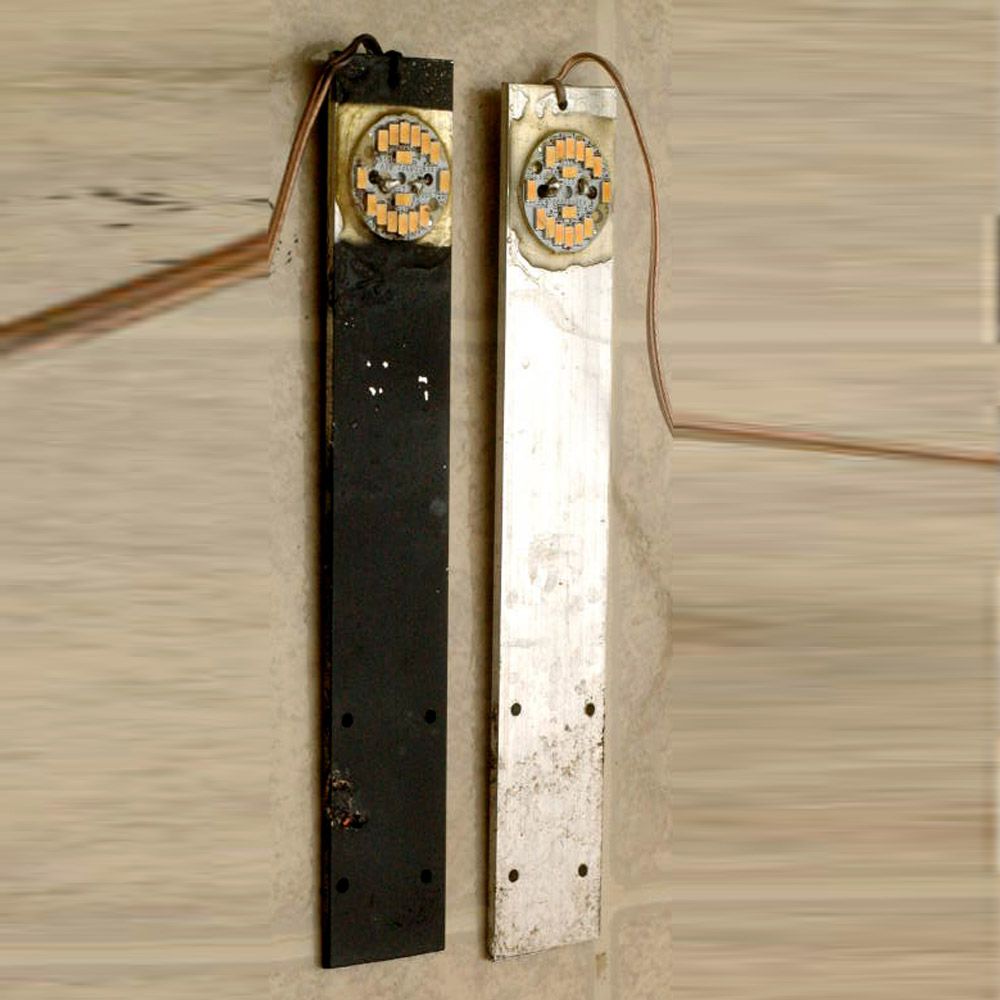
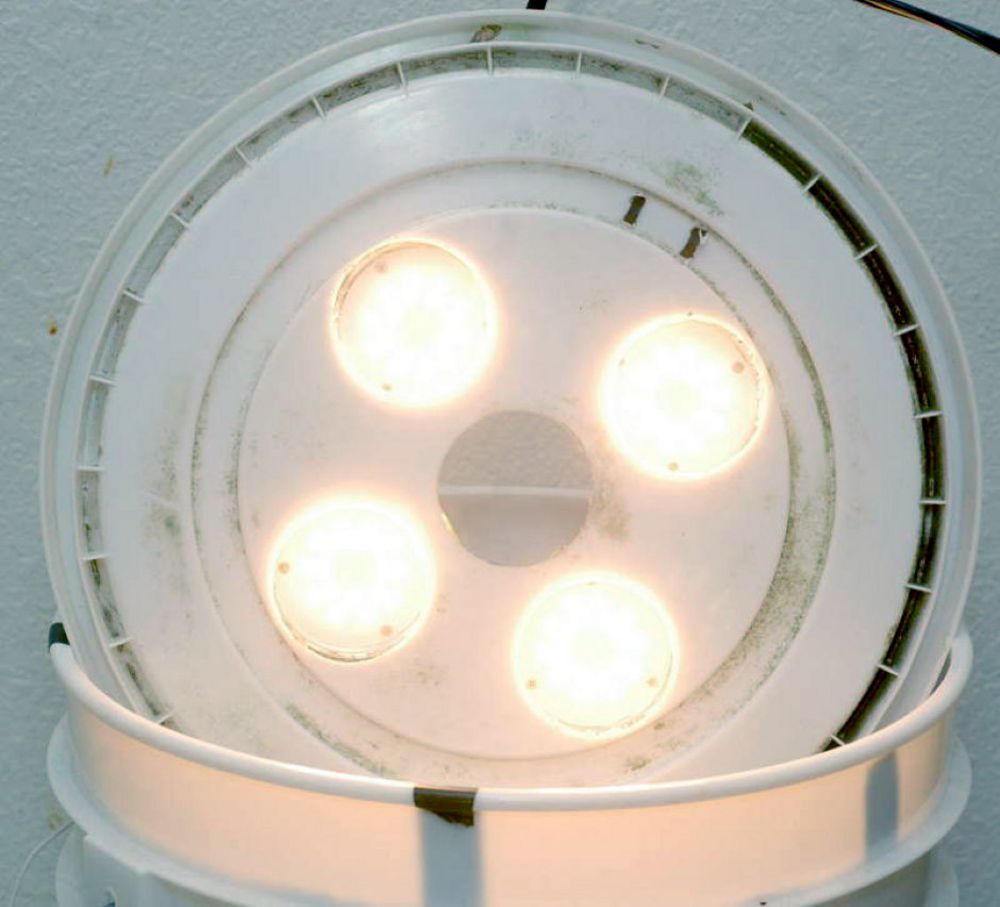
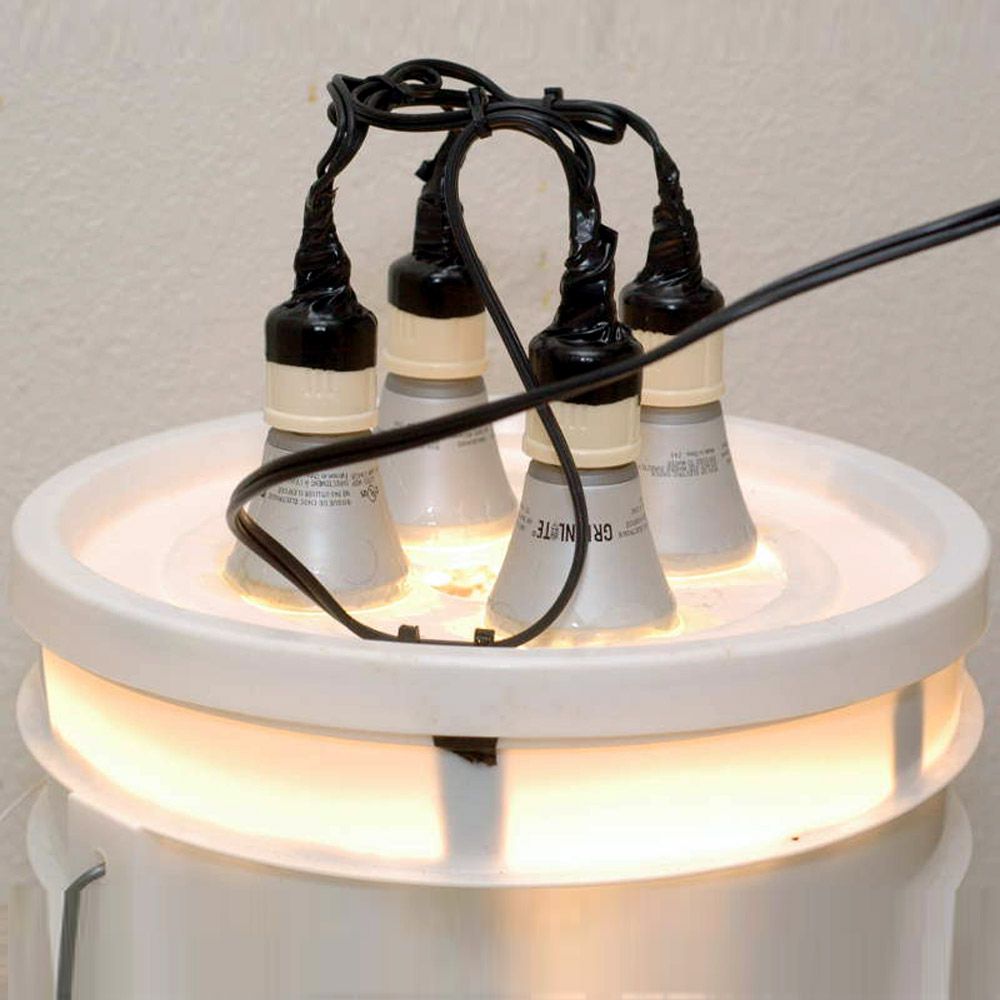
Put a bulb that has all the LEDs shining in one direction in double plastics bags and smash the glass. Pick and file as needed. During picking there were tiny bits of glass flying up in my face so use eye protection. I put 4 on a bucket lid. The lamps were wired in parallel with solder and heat shrink tubing wire connections to the light sockets used. Scotch Super 33+ (the best standard electrical tape) was wrapped around the connection to provide good electrical and mechanical isolation. Four bulbs were daisy chained together so I had only one LED light cord to deal with from the lid. Rubber glue with a brush was used to cement the Mylar to the bucket lid. You can see the ducting on the underside from the 90 degree PVC bend. The LED heatsinks are outside the Space Bucket! The side light is a the same LED light as the top of the lids but the LED module is removed and mounted on 1/8th aluminum that is 1 1/2 inch wide and 8 inches long. So I remove the LED modules but still use the lighting power supply. This means I'm working with safe, low voltage lights around the plant canopy. Speaker wire was used for the low voltage lighting and the speaker wire is soldered to the output of the light's power supply, heat shrink tubing, wire stress relieved with a tie-wrap and taped up with the Scotch Super 33+ electrical tape. So, I get custom lighting with no electronics work beyond a little bit of soldering. Do at you own risk but for fast and easy bucket side lighting, this is an easy way to go. You can typically use heat grease and screw the module down but I just use 5 minute epoxy around the edge of the LED module. Allow 5 hours to cure other wise you may end up with a gooey mess. PLANT JOURNAL
Grand Daddy Purple, a fairly low yielding indica (note, I can get +3 oz per square foot under HPS with intracanopy LED lighting in soil off a related strain, Purple Arrow). 60 days flowering, right out of the cloning aeroponic chamber. I did leave it in the aero chamber an extra 7 days to rapidly build up the roots while doing a foliar feeding. I use Miracle-Gro Moisture Control soil. With ultra high lighting levels you either need to go hydroponics or use a soil that holds more moisture. You can add vermiculite or something but I hate vermiculite and perlite. When I first started growing in 1995 I used a 50/50 blend ebb and flow. Crap got everywhere! They're like little static electric magnets. Ignore the time release fertilizer claim- that's more suited to low light house plants and insignificant to this type of growing. Fertilizer: General Hydroponics 3 part Flora series at 1200 ppm, pH 6.5. I had to use a 50/50 grow/bloom mixture due to the higher lighting levels. A bloom mixture alone isn't going to cut it as I found out due to chlorosis (chlorophyll breakdown from too low of nitrogen). Every 3 days I would flush the plant with plain water at pH 6.8 and then add the fertilizer solution at 1200 ppm. Plain water flush for the last 10 days. So, I missed my projected goal of 28 grams by 2 grams. The nugs were surprisingly dense with all the extra photosynthesis going on.